Creating a Gallery Wall

In case you missed the other bazillion other how-to create a gallery wall posts, here's another one for good measure. First of all, here is a before shot of the wall. It was just too plain and needed something larger to scale:

First I gathered several frames from my craft closet (my rotating art and photos) and laid them all out on the ground. Then I moved them around until I got them arranged in a way that I liked:

Then I got some large paper the kids use for drawing, traced the frames and then cut them out. Then I arranged them on the wall in a similar way I had arranged them on the ground:

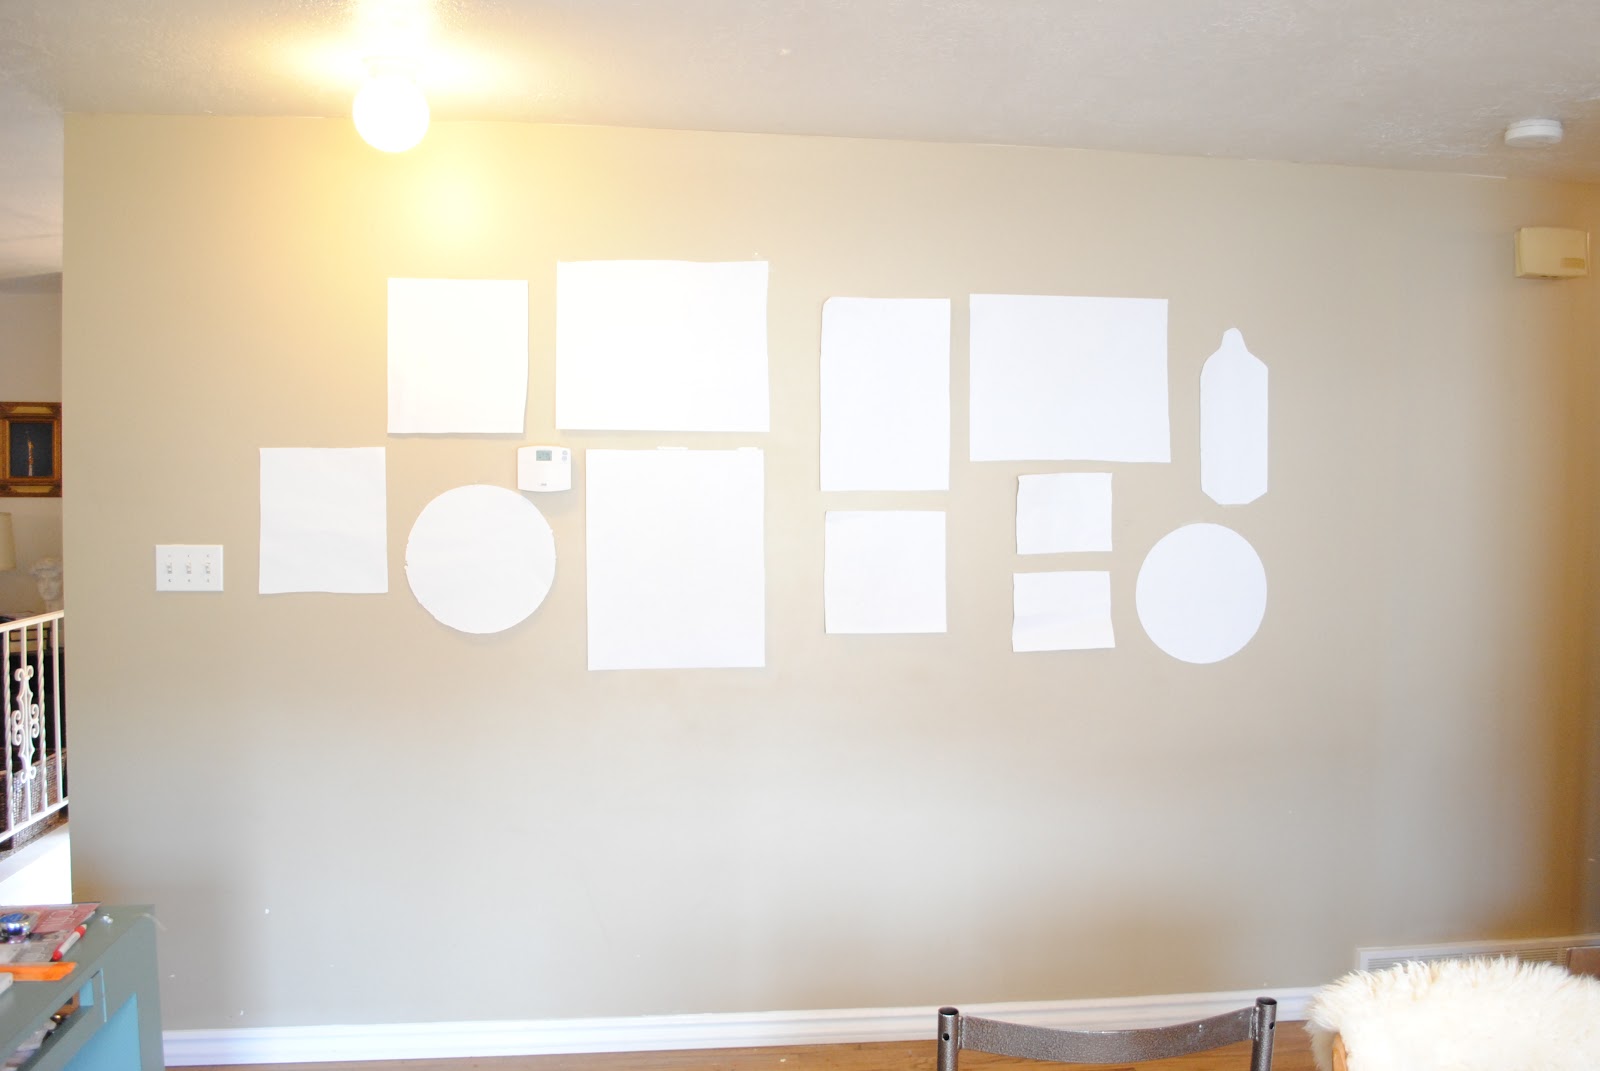
After I moved them up and switched a few around, I measured the back of the frames where the nail would go and then drew corresponded hole marks on the paper so that I would only have to hammer once...look ma, no extra holes! I just put the frames right on top of the paper (if you look super closely you can see the paper peeking out on some parts:

After removing the paper, this is what I was left with:

I am on the hunt for a beat up antique bench to go here now, I think it will look great with a pair of old rain boots underneath and a few potted plants with perfectly adorable gardening gloves just draped over as if I had been toiling all day in my lovely garden...I can just see it now...


Comments